How Can We Help?
MyClinic365 Healthcare Portal
MyClinic365 Healthcare Portal – Public and Private
Read me for latest updates 10th July 2023
MyClinic365 experienced high demand during the vaccination role out to provide a simple booking solution that didn’t require patient authentication, that allows for the gathering of custom information and can provide basic triage.
We have subsequently built the MyClinic365 Healthcare Portal. A secure simple to use GDPR compliant platform that ensures that all data remains in the EU.
To access the healthcare portal, go to: MyClinic365 Healthcare Portal
The MyClinic365 Healthcare Portal provides for a very simple and intuitive user experience for patients.
As mentioned, this does not require any authentication, but we do link the patient if they already exist in the system. This ensures that creation of duplicate patients is minimised.
New patients can make one booking and then sit in a state of pending until such time as the practice approves them as patients or rejects them.
The portal is tightly integrated with our current platform, so all our current functionality continues to work in the portal including payments, reminders, patient check-in, triage, call to the door, video consultations etc.
Listing is currently free, and you can sign up here
Setup Steps
Add Services
If you wish to allow patients the ability to book services or want to display the services, your practice offers then you need to add services.
Please see the following link on how to setup services: https://youtu.be/_QdVq44A29g or go to settings/services and add the services you offer.
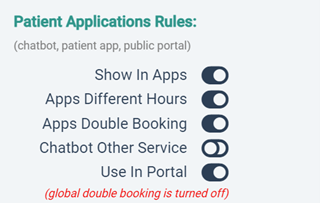
Please ensure that the “show in apps” and “use in portal” are turned on for the service:
Service Description
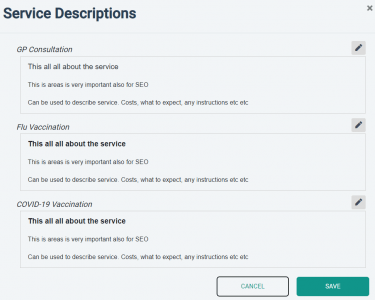
To update the service description (information patients see about service when booking/enquiring) go to settings/Patient Apps and then click on Edit services description.
For each service you offer you can use the text editor to add any information you require about that service.
Add Staff
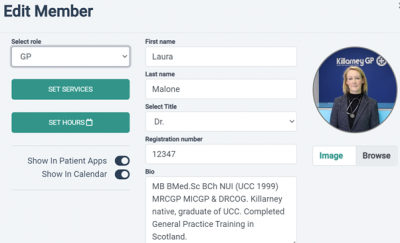
To add staff, click on “add staff” from the menu and create your staff members. Each staff member will need a unique email address.
Each staff member will need their services set and their hours.
Each staff will also need to be enabled for the portal – turn on “Show in Patient Apps”
Portal
There are now two portals available 1) Private Portal specific to your practice and 2) Public Portal that is publicly searchable
Both portals are configured from the one location. To setup the portal go to Settings then Patient apps
Private Portal
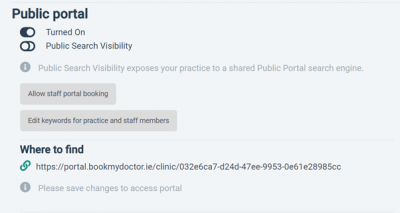
To turn on the private portal make sure the “turned on” radio button is on in public portal. This activates your private link. This link can be added to your website, Facebook page, google business listing etc.
Public Portal
To turn on public portal then both radio buttons need to be switched on – “Turned on” and “Public Search Visibility”
Configure Staff for Bookings or Enquiries
The public portal allows you to disable bookings and to only present an enquiry form that securely sends enquiries through the MyClinic365 platform. This is enabled by clicking on “Allow Staff portal booking” and selecting the staff member that you want to enable the enquiry form for. If you do not do this step staff members will present their appointment books if available.
Edit Keywords for Practice and Staff
Edit keywords allows you add key words for your practice e.g. your specialities, services offered etc and separate keywords per individual staff member. It needs to be stressed that this information is used for SEO and is extremely important for you to receive a high ranking in our search results and in public internet searches.
Patient Intake Form
You can design your own intake form by either adding your own custom fields or by using standard fields already defined within MyClinic365. This information will be collected at time of enquiry or booking.

Mandatory Fields
The following fields are mandatory and cannot be edited:
- First Name
- Last Name
- Sex
- DOB
- Phone
Optional Fields
Optional fields are fields that already defined as part of the MyClinic365 platform. These include:
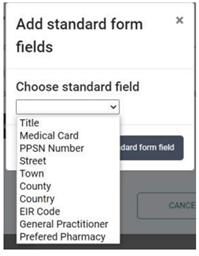
Custom Fields
To add your own custom fields, go to “add custom field” and select field type. Give it a label and set the mandatory field if required. Any custom information will be gathered and available in the detail section of the appointment. Clicking the copy button allows for this data to be quickly copied and pasted for input into the EHR if required.
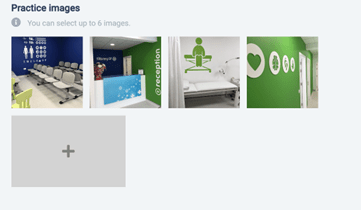
Practice Images
Up to 6 images can be added for your practice profile.
Practice Descriptions
As part of the portal listing each practice has its own listing and descriptions can be added for each practice and each practice location if multiple practices exist.
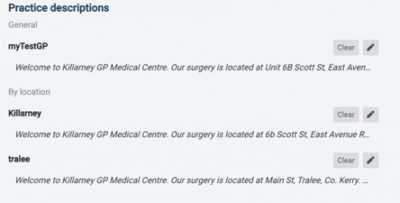
Any changes take approx.15 mins to appear in the public portal and can be updated or deleted at any time
Patient Bookings
If patient is already existing, then portal will recognise patient and merge booking with existing patient.
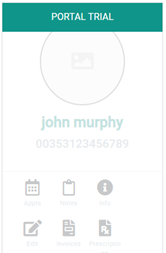
If it’s a new patient, they are allowed to book one appointment and are then put in a state of Portal trial. Patient will not be allowed to book further appointments until such time as the practice decides they wish to accept patient.
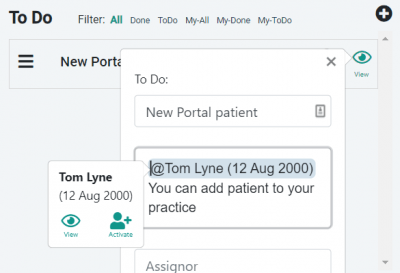
If patient is in Portal Trial status, then the platform will automatically create a ToDo to allow you to review the patient and quickly activate the patient using the activate button. Once a patient is activated, they will become an active patient within the practice. They can quickly be deactivated by changing their status to deactivated.
All bookings will need to be confirmed by the patient clicking on their confirmation email.
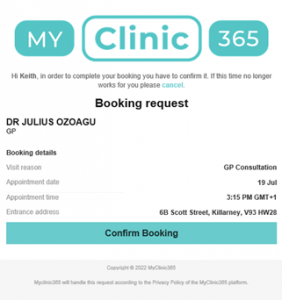
Prior to confirmation they will be shown in the calendar with a reserved status like chatbot and patient app bookings. They are reserved for 15 mins. Portal Bookings will have a globe icon within the booking to identify it as a portal booking.

